Chapter 2 of 11
18%
PROS Documentation
If you need to refer to any Documentation for PROS 3 here is the link: PROS 3 Documentation
If you are using PROS 4, refer to the following documentation: PROS 4 Documentation
Important Folders
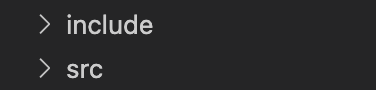
There are only 2 folders that are very crucial when actually programming, you can ignore the rest for now. Those folders are the following:
The include Folder
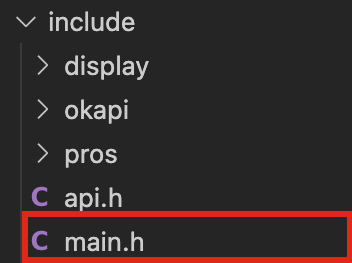
The first folder is the include folder. This is where all of your "header" files will go. These .hpp or .h files aren't where you write any of your executable code, but acts as a way for your files to communicate with each other, so that you can access your variables in all of your files. You'll see the following folders in the include folder. For now, the only ones that you'll be editing are "main.h" and files that you'll be creating.
If you go into that file, there are descriptions of what each part does; however, you can just scroll down until you reach the following section because that is the only place you will ever be modifying.
#ifdef __cplusplus
/**
 * You can add C++-only headers here
 */
// e.g. #include <iostream>
// e.g. #include "file_name.hpp"
Whenever you create a new .hpp or .h file, just include the file name in that section which you can see an example in the code.
The src Folder
This is the main folder that you will be coding in. Here you'll find only one file called main.cpp

Click into main.cpp and now we will cover everything that is in it!
#include "main.h"This first line tells us to include all the header file "main.h" (this file should contain all of your other header files which means that this line allows you to import all of your variables and functions that you've defined). Make sure you include this line at the top of each C++ file
/**
 * A callback function for LLEMU's center button.
 *
 * When this callback is fired, it will toggle line 2 of the LCD text between
 * "I was pressed!" and nothing.
 */
void on_center_button() {
    static bool pressed = false;
    pressed = !pressed;
    if (pressed) {
        pros::lcd::set_text(2, "I was pressed!");
    } else {
        pros::lcd::clear_line(2);
    }
}
This is custom function that PROS made as an example, the function description is written above the function as a comment. This isn't one of the important functions, if you want you can even delete this function.
/**
 * Runs initialization code. This occurs as soon as the program is started.
 *
 * All other competition modes are blocked by initialize; it is recommended
 * to keep execution time for this mode under a few seconds.
 */
void initialize() {
    pros::lcd::initialize();
    pros::lcd::set_text(1, "Hello PROS User!");

    pros::lcd::register_btn1_cb(on_center_button);
}
This is a very important function. All of the code in this function will be executed whenever you run your code. You'll see that the current actions in it all have something to do with pros::lcd - that is how you interact with the screen on the brain. It sets the text on line 1 of the brain to "Hello PROS Users!" and if the user presses the center button, it will call the on_center_button function.
/**
 * Runs while the robot is in the disabled state of Field Management System or
 * the VEX Competition Switch, following either autonomous or opcontrol. When
 * the robot is enabled, this task will exit.
 */
void disabled() {}

/**
 * Runs after initialize(), and before autonomous when connected to the Field
 * Management System or the VEX Competition Switch. This is intended for
 * competition-specific initialization routines, such as an autonomous selector
 * on the LCD.
 *
 * This task will exit when the robot is enabled and autonomous or opcontrol
 * starts.
 */
void competition_initialize() {}
These next two functions don't have anything in them at the moment. You can read the description of what they are intended to be used for, but we won't need to touch them.
/**
 * Runs the user autonomous code. This function will be started in its own task
 * with the default priority and stack size whenever the robot is enabled via
 * the Field Management System or the VEX Competition Switch in the autonomous
 * mode. Alternatively, this function may be called in initialize or opcontrol
 * for non-competition testing purposes.
 *
 * If the robot is disabled or communications is lost, the autonomous task
 * will be stopped. Re-enabling the robot will restart the task, not re-start it
 * from where it left off.
 */
void autonomous() {}
This is where you put your code when autonomous runs.
/**
 * Runs the operator control code. This function will be started in its own task
 * with the default priority and stack size whenever the robot is enabled via
 * the Field Management System or the VEX Competition Switch in the operator
 * control mode.
 *
 * If no competition control is connected, this function will run immediately
 * following initialize().
 *
 * If the robot is disabled or communications is lost, the
 * operator control task will be stopped. Re-enabling the robot will restart the
 * task, not resume it from where it left off.
 */
void opcontrol() {
    pros::Controller master(pros::E_CONTROLLER_MASTER);
    pros::Motor left_mtr(1);
    pros::Motor right_mtr(2);

    while (true) {
        pros::lcd::print(0, "%d %d %d", (pros::lcd::read_buttons() & LCD_BTN_LEFT) >> 2,
                        (pros::lcd::read_buttons() & LCD_BTN_CENTER) >> 1,
                        (pros::lcd::read_buttons() & LCD_BTN_RIGHT) >> 0);
        int left = master.get_analog(ANALOG_LEFT_Y);
        int right = master.get_analog(ANALOG_RIGHT_Y);

        left_mtr = left;
        right_mtr = right;

        pros::delay(20);
    }
}
This is what your program executes during the Driver-Control Period. You can see that there is already some basic drive-code that's already there, let's take a dive at what each line does. The first 3 lines are all definitions of PROS objects. The first one defines the controller which is named "master". The next two lines define motors on the left and right side with their port numbers.
Next there's a while (true) loop. This is so that your program can continuously run throughout the entire Driver-Control-Period instead of just one time. You'll see some other code and that's what is going to allow your robot to drive. We will be coding a more custom function for driving in the next chapter, but notice the pros::delay(20); at the end of the while loop. This 20 millisecond delay is very important, so that you're the V5 Brain doesn't have to constantly execute the loop in even faster time.
Define a motor called 'arm' that's on port 16
Create a new file called globals.cpp and another one called globals.hpp in the correct locations; Define at least 4 motors on your drivebase in globals.cpp file with the 600RPM Cartridge as well as the controller. In your globals.hpp file, make all of those motor names global and remember to add the globals.hpp to your main.h file.